It's true, I'm moving ... over to Wordpress. Please update your links to http://bruceburkhartdesigns.wordpress.com/. Updates will continue there. This site will continue to live for a little while but not be updated.
I'll be updating my links to point to the new site over the next few days.
Also, I'm working on a new web site: http://bruceburkhartdesigns.weebly.com/index.html. Eventually I plan to have a real domain. Check it out and let me know what you think.
Thanks to all who have followed, commented or lurked here. I hope to see you all over there!

Tuesday, January 22, 2013
Friday, December 14, 2012


Monday, August 6, 2012
Another Random Project
Wow, over three months since the last post! My apologies for the lack of updates. Time seems to have sped up over the summer months!
Anyway, here is the latest project that I've completed; a sort of process post on how to make DIY chalkboards!
Materials:
- 4'x8' sheet of 1/4" plywood or MDF (I cut it down to 4 2'x4' sheets)
I used plywood because the local big box hardware didn't have 1/4" MDF. Keep in mind plywood is much more porous than MDF and MDF will have a much smoother surface.
- 1"x2"x8' Pine 12' for each chalkboard (48' worth)
- 8 eye screws
- Chalkboard paint 1qt
- Primer paint 1qt
- Framing wire (for hanging)
- 3/4" Self tapping counter sink screws (1 box)
- Chalk (sidewalk or regular)

To start, cut the 1"x2"x8' Pine to 2' pieces and 44" pieces and frame out the sheets of 2'x4' plywood or MDF.
Using the 3/4" screws, attach the 2' Pine lengths to the 2' ends of the plywood or MDF and attached the 44" lengths to the 4' sides of the plywood or MDF.


Using the primer paint, prime the surface that will become the chalkboard and let dry.

Once the primer is dry and has a satisfactory coating, using the chalkboard paint, paint the surface over the primer. Be certain to coat it evenly and completely. It may take two coats.

Once the chalkboard paint is dry, screw in the eye hooks on the inside of the back and attach the framing wire across for hanging.

 Use!
Use!

I hope this will give some insight into making your own or some inspiration for your own project!
Leave a message with any questions. I'll do my best to answer them.
On another front I've made some decisions going into the next bottle cap project ... stay tuned!
Anyway, here is the latest project that I've completed; a sort of process post on how to make DIY chalkboards!
Materials:
- 4'x8' sheet of 1/4" plywood or MDF (I cut it down to 4 2'x4' sheets)
I used plywood because the local big box hardware didn't have 1/4" MDF. Keep in mind plywood is much more porous than MDF and MDF will have a much smoother surface.
- 1"x2"x8' Pine 12' for each chalkboard (48' worth)
- 8 eye screws
- Chalkboard paint 1qt
- Primer paint 1qt
- Framing wire (for hanging)
- 3/4" Self tapping counter sink screws (1 box)
- Chalk (sidewalk or regular)

To start, cut the 1"x2"x8' Pine to 2' pieces and 44" pieces and frame out the sheets of 2'x4' plywood or MDF.


Using the primer paint, prime the surface that will become the chalkboard and let dry.

Once the primer is dry and has a satisfactory coating, using the chalkboard paint, paint the surface over the primer. Be certain to coat it evenly and completely. It may take two coats.

Once the chalkboard paint is dry, screw in the eye hooks on the inside of the back and attach the framing wire across for hanging.


I hope this will give some insight into making your own or some inspiration for your own project!
Leave a message with any questions. I'll do my best to answer them.
On another front I've made some decisions going into the next bottle cap project ... stay tuned!
Tuesday, April 24, 2012
Ink Change Up
I've decided to switch from water based relief printing inks to Caligo Safe Wash inks. I only experimented with them on one project so far and I can tell they are going to take some getting used to; very different from water based relief inks.
 I'll try to update my progress using the new inks as I use them in future projects.

Screen Printing Press Set Up
I've been getting some inquires as to my screen printing set-up. It's a cobbled together simple set-up. The whole thing is mounted to a chunk of 1/2" scrap ply wood (for portability) and made to use 20"x24" screens. The "platform" was made to take t-shirts as well as small posters. The "platform" is mounted to the base on 2x4's and is 1/2" thick cabinet grade piece of wood. There is a shoe lace clamped to the side that goes through a eye hook and a 20 oz. Plumb hammer through a loop on the other end as a counter weight. I haven't done anything with registration; so I'm not sure how effective it is at multi-color projects.


More Hops
Here is the outcome of using the Humulus Lupulus block on fabric! I used oil based ink (black) and fabric from the local fabric store. I applied a hot iron to cure and washed them to make sure the ink was set.


 I only printed two and had the edges rolled and sewn. I think they turned out well and will be experimenting with block printing on fabric in the future!


More Birthday Prints
As promised, I'm updating the outcome of the birthday prints. I decided to do random colors (orange, blue, silver, black) and random overprints.

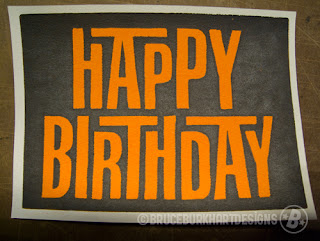
 Some interesting, unpredicted results with some of them!


Subscribe to:
Posts (Atom)